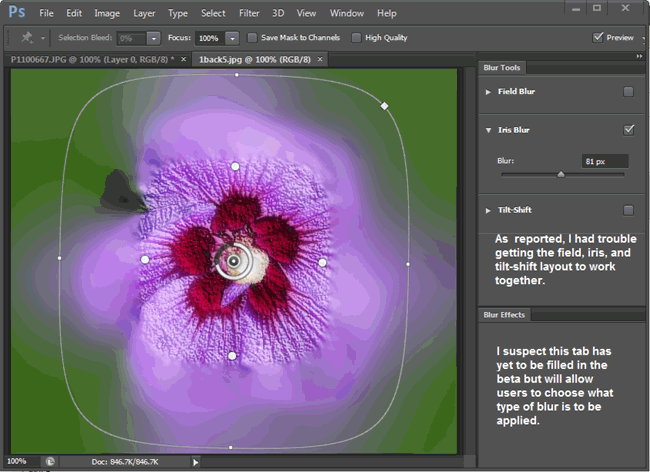
The Blur Gallery appears to be incomplete in the first beta of Photoshop 6. And I sincerely hope so and shall show you why here. You can find the Blur Gallery under the Filter Menu – choose anyone of Field Blur, Iris Blur or Tilt-Shift Blur – and then screen above will appear. The sidebar on the right will be temporarily replaced with the Blur Gallery options – Field Blur, Iris Blur and Tilt-Shift Blur plus an empty Blur effects Tab.
Tilt-Shift Blur
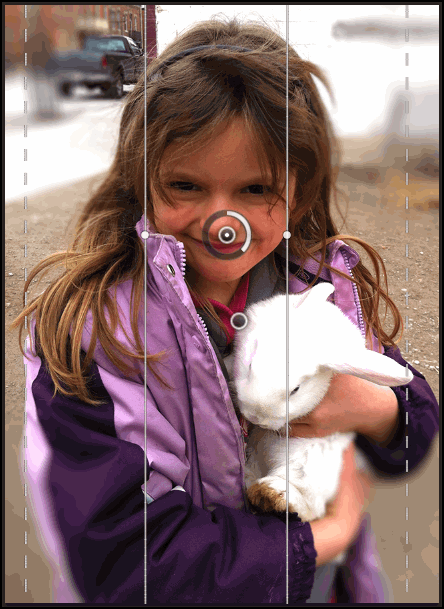
As you can see from the +screenshot above the Tilt Shift blur just does not work for the image used. Areas are blurred that should not be and areas are left unblurred which should be blurred. Now I tried adding two more Tilt Shift Blurs to the image at the top and bottom using the tilt=rotate capability so the blur gradation lines were horizontal and thus the blur at the top could be corrected. But that simply did not work – the three Tilt Shifts combined in very strange ways but not the accumlated blur I had hoped for[the last blur pinned on dominated the other two]. Now there maybe a CTL+?? trick when applying a second or third button but I did not know it despite watching 3 of the top 6 intro videos. So I switched to the Iris Blur.
Iris Blur
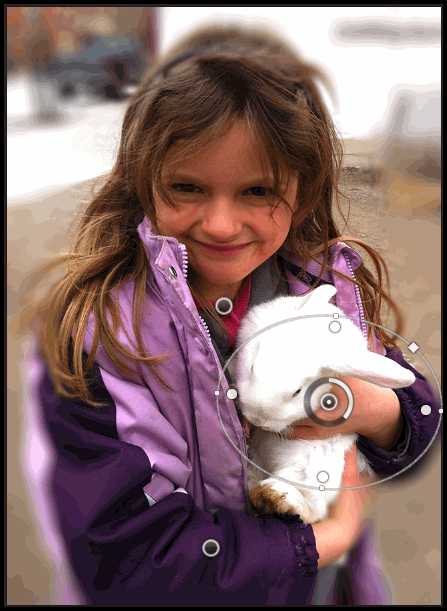
In contrast to the Tilt-Shift Blur the Iris Blur worked when I applied multiple Blur pins to the image. But in this case I found myself applying so many Iris Blur pins and never quite getting the blurring precision I wanted. I tried mixing Tilt-Shift with Iris Blur but that simply did not work[Bug??]. But the important point is that I realized the best or fastest combination was to apply a mask on the background areas I wanted blurred followed by one of the gallery blurs.
Combo Mask + Iris Blur
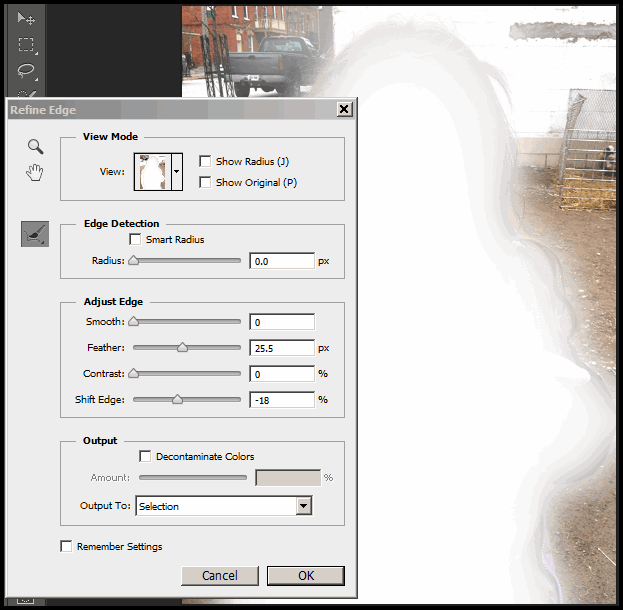
Okay, I fibbed. I applied the mask to the girl first than Select | Inverse gets the mask desired on the background to be blurred. By the way Refine Edges is essential here and I am on the lookout for an even more precise masking tool or plugin…. again. The next screenshot shows the results of applying an Iris Blur to the masked background.
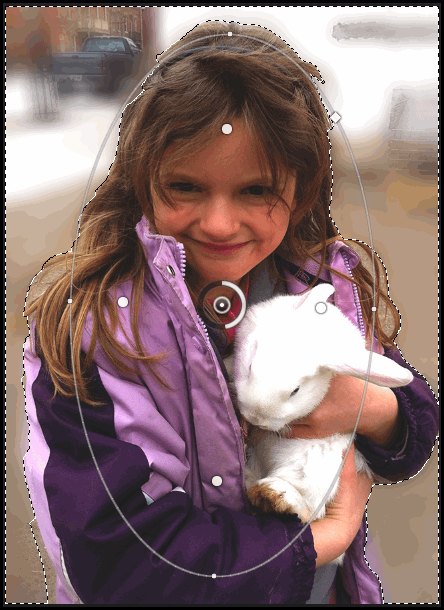
Now the blurring is more precise and approximates using a high f-stop like f-16 or f-22 on a bright sunny day. But this had the old upper gray cells working overtime – why not apply prefered blur perhaps a Gaussian directly to the masked background. Itcertaily works well but is too uniform. It does not have the blur gradations achievable with the Iris Blur easily by widening or narrowing the blur transition area indicated by the large and then small circle icons. Pull the small icon to widen the transition spread, push in to narrow the spread. And this is the key attraction of the BlurGallery – Adobe could expand it to be an Exposure Gallery or Destauration Gallery or Filter-effects Gallery. I suspect users adept in Actions or ExtendScript are drooling at the possibilities.
Summary
The new Blur Gallery did not work as effectively as expected. I could not find the menu or key commands to have the underlying blur mask revealed so I could check on what PS6 was doing. But clearly in my beta the use of multi -Tilt Shift pins was going awry as well as combining several different pins. Also the ability to choose the blur effect to be applied was missing in action – I would like to combine a Motion Blur with perhaps a Surface Blur which would be wonderful [just pick up the last used blur settings]. Longer term, these Lightroom-like controls could be applied to Image Adjustments and Effects to truly extend the Photoshop photofinishing franchise. In sum a mixed reaction to the Blur gallery, despite the bugs there is great promise here.
