
There are many images on the Web that are just good. This small tutorial will show how easy it is to go from good to better using a free Photoshop-like Image editor. However this could also be done online with anyone of 8 free online image editors. In the spirit of demo-ing how practical the online photo editors are, this bit of photofinishing will be done at Pixlr.com. So lets take a look at the “good” image.
A Good Image
While perusing the Simply Splendid Food website [and watering at the mouth over some fabulous recipes] I ran across a classic good image. Here it is:
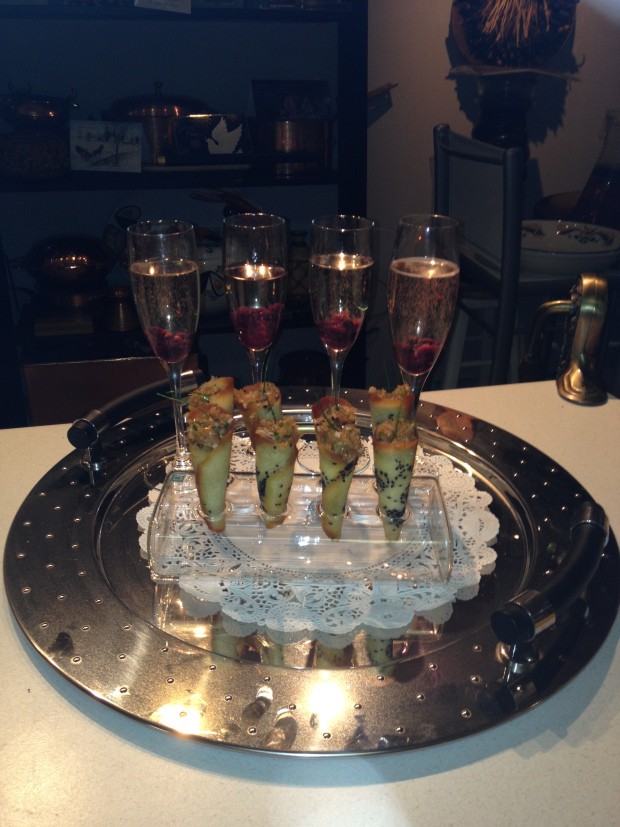
This image is good because it presents servings with drinks that delight the eye and tempt the palate. But this image also could be great with some simple edits:
1) Crop from the top the distracting and unneccesary background clutter;
2) The image is slightly underexposed – make it brighter with the Levels or Curves command;
3) Also the colors are muted so use the Exposure and/or Saturation commands to brighten the colors;
4) Then darken or blur the background;
5) Then paint over the bright light reflections in the background;
6) Do final color adjustments;
7) Sharpen the overall image.
Yes the photofinishing recipe is seven steps long. but the good news is that with Art Weaver on your PC or Pixlr on your iPad, these corrections are very easy to do. And better, both software tools are free and easy to learn. In this tip we use Pixlr.com because it is immediately available on the Web and is fast & easy to use.
Cooking with Pixlr
Another reason we chose Pixlr is because it borrows the look of Photoshop. Not slavishly, but enough to be useful:
Step 1 Crop and Sharpen
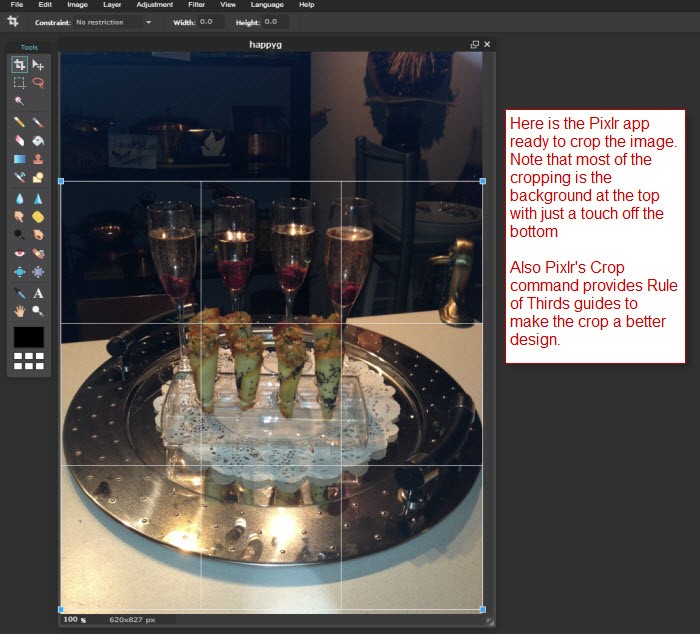
Many Photoshop and Corel Paintshop Pro users will recognize the layout of the toolbar and menus and thus will be comfortable right away with photo editing in Pixlr. And the Rule of Thirds cropping guides are helpful to Designers in general.
Step 2 Brighten and Saturate
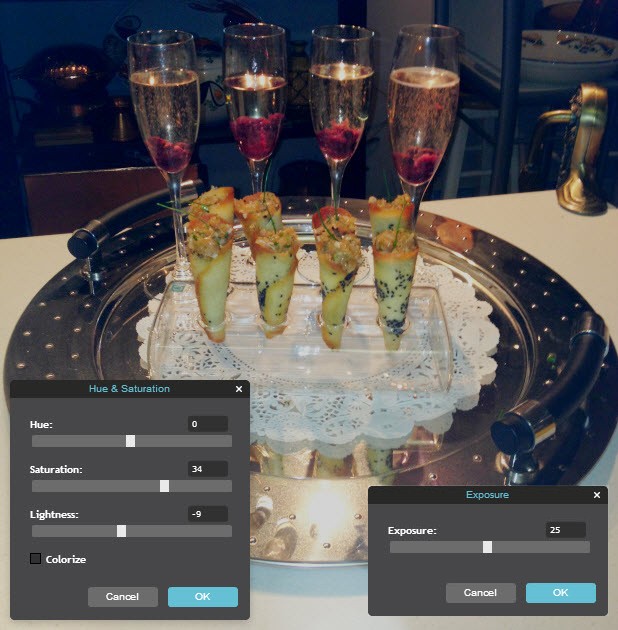
Exposure correction is done with Adjustments | Exposure command. I played around with the slider and went fairly high to make the dinner plate and glasses suitably brighter. then I followed with Adjustments | Hue Saturation and went very more saturated but lowered the brightness. For the sake of brevity, both correction panels are shown on one screen shot – you must use the photo correction tools one by one.
In order to fix the background which now has become more distracting, there are two approaches – blur and/or darken. But first it is necessary to mask off the background area using the Lasso mask tool. This mask will ensure that any blurring or darkening done will only apply to the background area and not the foreground.
Step 3 Masking the background
Masking marks the areas where the next sequence of photofinishing operations will be applied; all other areas outside the mask are protected from photofinishing. Drawing the mask around the glasses is a challenge. So use the Lasso tool and do the masking in three steps. The second time you use the Lasso tool press the SHIFT key so the new mask area will be added to the existing mask. To erase a portion of the mask, press the CTRL key. The following screen shot shows the resulting mask after the Filter | Gaussian Blur set to 50 [lower mid range] and then the Adjustments | Exposure set to a low 20 value.
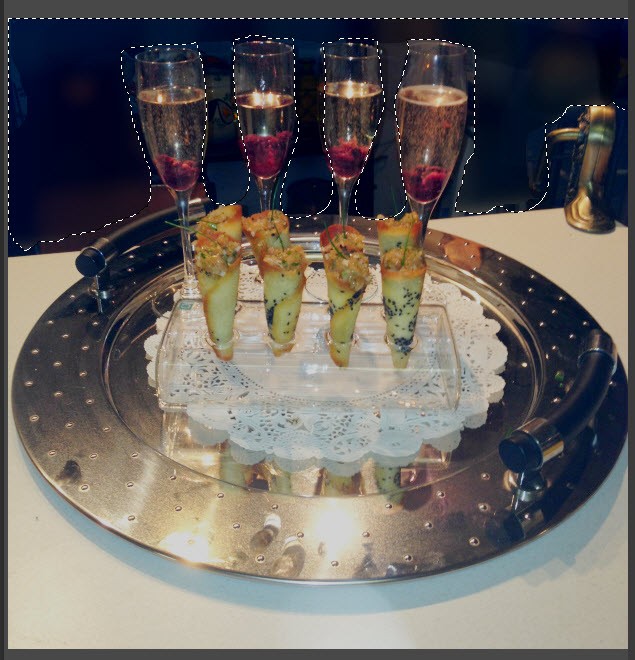
Note that in the final adjustments the area around the glass stems will be smoothed out darker with the Burn tool.
Step 4 Remove Mask for Final Touch ups
Use the keyboard command CTRL-D to remove the mask. Then add some touch-ups with the Burn tool around the glasses and a Filter | Sharpen command again. The resulting image is very nice indeed:

Summary
With a few steps a good image can be made to look a lot better using free online photo editing tools like Pixlr or any of 7 others. On your PC or laptop there also a wide range of free tools many of which have been featured here on thePhotoFinishes.com [see ArtWeaver and PhotoScape]. And even better, Pixlr has plenty of Photoshop-like power to spare as we did not touch the special effects, layering, image repair and drawing tools also available.